Want to try the FreeStyle Libre 2 System? Get a 14 day sensor for free.

New customers only. Conditions apply. Try for free

security icon
security icon
visa icon
mastercard icon

30 day 100% money back guarantee on your first Starter Kit (Terms and conditions apply)

money-refund

5-7 day delivery (Estimated standard delivery)

delivery

All payments are secure and encrypted

safe

Your cart is empty

You just received your FreeStyle Libre system. What next?

Select your system:

Apply and activate your FreeStyle Libre 2 sensor

Prepare the skin and apply your FreeStyle Libre 2 sensor

1. Clean and dry the back of your upper arm where you will apply the sensor

Avoid areas with scars, moles, stretch marks or lumps. Select an area of skin that generally stays flat during your normal daily activities with no bending or folding. Choose a site that is at least 2.5cm (1”) away from an insulin injection site.

An alcohol wipe is a good way of cleaning the skin, but make sure you’re not using a moisturising alcohol wipe as this will prevent the sensor from sticking properly. Make sure you fully dry your skin before applying the sensor.


The sensor kit comes in two parts: the sensor applicator and the sensor pack.

2. Peel the lid completely off the sensor pack and unscrew the cap from the sensor applicator.

Caution: Do not use if the Sensor Pack or the Sensor Applicator seem to be damaged or already opened. Do not use if past expiration date.

3. Attach the sensor applicator to the sensor pack.

Place the sensor application into the open sensor pack. Line up the dark mark on the applicator with the mark on the pack and press down firmly on the sensor applicator until it comes to a stop.

4. Apply the sensor to your pre-cleaned section of skin on the back of your upper arm.

Place the applicator over the application site and push firmly until the sensor is in place.

The Sensor Applicator contains a needle. Do not touch the inside of the Sensor Applicator and do not push down on the Sensor Applicator until it’s placed over the application site.

Make sure the sensor is secure after application.

Activate your FreeStyle Libre 2 sensor

  • Open the FreeStyle LibreLink app on your phone.

  • On iPhone tap Next on the Apply a new sensor screen.

    Tap SCAN NEW SENSOR.

    A Ready to Scan popup will appear on your screen.

    On Android phone scan to start a new sensor.

  • On iPhone hold the top of your phone near your sensor (this can be over your clothing). Don’t move your phone.

    You will hear a tone or feel a vibration.

    On Android phone hold the back of your phone near the sensor (this can be over your clothing). Don’t move your phone.

    You will hear two tones or feel two vibrations.

  • Wait 1 hour for your sensor to adapt to your body before scanning to get glucose readings.

Download the FreeStyle LibreLink app

Scan your FreeStyle Libre 2 sensor and get glucose readings on your phone.

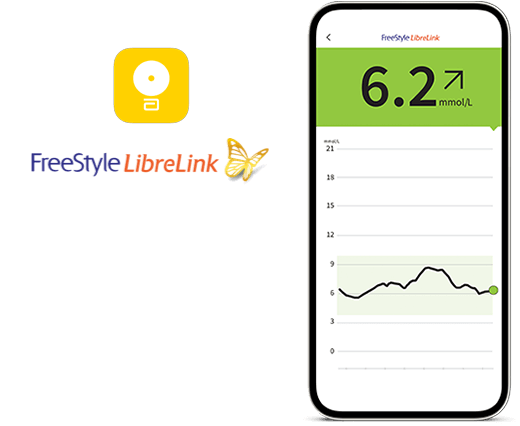
The FreeStyle LibreLink app allows you to measure your glucose levels from your smartphone anytime, anywhere.

FreeStyle LibreLink

Set up alarms

To set up alarms on the FreeStyle LibreLink app

  • Make sure Bluetooth is turned on before starting the FreeStyle Libre 2 sensor with the app

  • Open the FreeStyle LibreLink app

  • Tap on the menu and select ‘Alarms’

  • Tap ‘Low Glucose Alarm’

  • Toggle to ‘On’ to activate the alarm

  • Set the alarm threshold

  • Tap the back button

  • Repeat steps 3 to 5 for the ‘High Glucose Alarm’ setting

Glucose alarms are now on.

The Signal Loss Alarm is automatically turned on when any of the alarms are turned on. The Signal Loss Alarm will notify you if your Sensor has not communicated with the App for 20 minutes and you are not receiving Low or High Glucose Alarms.

Apply and activate your FreeStyle Libre 3 sensor

Prepare the skin and apply your FreeStyle Libre 3 sensor

1. Clean and dry the back of your upper arm where you will apply the sensor

Avoid areas with scars, moles, stretch marks or lumps. Select an area of skin that generally stays flat during your normal daily activities with no bending or folding. Choose a site that is at least 2.5cm (1”) away from an insulin injection site.

An alcohol wipe is a good way of cleaning the skin, but make sure you’re not using a moisturising alcohol wipe as this will prevent the sensor from sticking properly. Make sure you fully dry your skin before applying the sensor.


The sensor kit comes as one piece applicator.

2. Apply the sensor to your pre-cleaned section of skin on the back of your upper arm.

Place the applicator over the application site and push firmly until the sensor is in place.

The Sensor Applicator contains a needle. Do not touch the inside of the Sensor Applicator and do not push down on the Sensor Applicator until it’s placed over the application site.

Make sure the sensor is secure after application.

Activate your FreeStyle Libre 3 sensor

  • Open the FreeStyle Libre 3 app on your phone.◊◊

    On iPhone tap Next on the Apply a new sensor screen.

    Tap SCAN NEW SENSOR.

    A Ready to Scan popup will appear on your screen.

    On Android phone scan to start a new sensor.

  • On iPhone hold the top of your phone near the sensor (this can be over your clothing). Don’t move your phone.

    You will hear a tone or feel a vibration.

    On Android phone hold the back of your phone near the sensor (this can be over your clothing). Don’t move your phone.

    You will hear tone and vibration after you have successfully started the Sensor.

  • Wait 1 hour for your sensor to adapt to your body before viewing your glucose readings.

Download the FreeStyle Libre 3 app◊◊

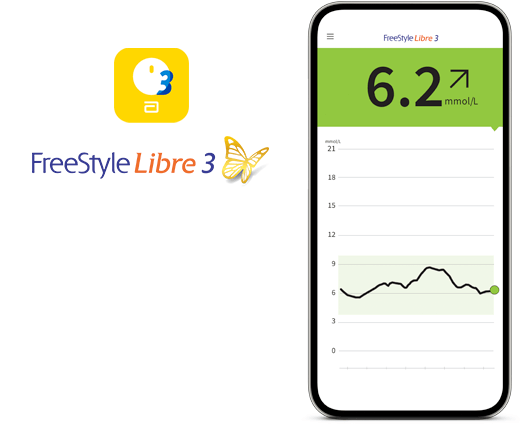
With the FreeStyle Libre 3 app, your FreeStyle Libre 3 sensor sends glucose readings to your phone every minute. No need to scan.
Find out more about setting up the FreeStyle Libre 3 app

FreeStyle Libre 3

Set up alarms

To set up alarms on the FreeStyle Libre 3 app

  • Make sure Bluetooth is turned on before starting the FreeStyle Libre 3 sensor

  • Open the FreeStyle Libre 3 app

  • Tap on the menu and select ‘Alarms’

  • Tap ‘Low Glucose Alarm’

  • Toggle to ‘On’ to activate the alarm

  • Set the alarm threshold

  • Tap the back button

  • Repeat steps 3 to 5 for the ‘High Glucose Alarm’ setting

Glucose alarms are now on.

The Signal Loss Alarm is automatically turned on when any of the alarms are turned on. The Signal Loss Alarm will notify you if your Sensor has not communicated with the App for 20 minutes and you are not receiving glucose readings or Low or High Glucose Alarms.

Connect with LibreView and LibreLinkUp

Connect to LibreView and share your data with your Healthcare Team.

  • Visit LibreView.com and click Sign up or Sign in

  • Connect your LibreView account to your practice account either by accepting your doctor invitation email on your smartphone or by adding your practice ID to connected apps in your FreeStyle LibreLink or FreeStyle Libre 3 app.◊◊

  • Your glucose data will automatically be uploaded to a secure cloud-based system and accessible to you and your doctor. No downloads required.Δ

Find out more about LibreView

Find out more about connecting our Digital Health Technologies

Connect to LibreLinkUp and share your data with friends & family

With the LibreLinkUp app§ your family and friends can get your glucose readings sent to their smartphone. Ideal for parentsѰ and caregivers, the LibreLinkUp mobile app allows them to keep up-to-date with glucose levels, wherever you are.ǁ

Parents and caregiver can head to their device's app store to download for free and follow the in-app instructions to set up.

Connect on the FreeStyle LibreLink or FreeStyle Libre 3 App

For the person wearing a FreeStyle Libre 2 or FreeStyle Libre 3 sensor that wants to share their glucose information with carers, family or friends.

To invite someone to see your glucose readings, open your FreeStyle LibreLink or FreeStyle Libre 3 app, then:

  • Open the Navigation Menu. From any screen, tap the "three lines" icon in the top-left corner.

  • Tap Share or Connected Apps.

  • Tap Connect or Manage in LibreLinkUp.

  • Tap Add Connection.

  • Enter Connection Information. Enter the name and email address of the person that you want to share your glucose readings with.

  • Tap Add.

You can share your glucose readings from FreeStyle LibreLink or the FreeStyle Libre 3 app with up to 20 family members and friends.

Related Reading

Connect on the LibreLinkUp App

For the family member or friend who wants to receive glucose information

After you receive a connection invitation email from a FreeStyle LibreLink or FreeStyle Libre 3 app user, click on the link in the email to download the LibreLinkUp app from the app store (if you don’t already have the app installed).

After installing LibreLinkUp app, follow the prompts to create an account and connect:

  • Tap Get Started Now on the welcome screen.

  • Review and accept the End User Licence Agreement and Privacy Notice.

  • Create an account. Enter your country/region of residence, name, email adress and preferred password.

  • Go to your email inbox to verify your account and complete setup.

  • After you have set up your account, you will see a notification telling you that FreeStyle LibreLink or FreeStyle Libre 3 app user would like to share their glucose readings with you. Press Accept.

You will now receive glucose information in the LibreLinkUp app. You do not need to have the LibreLinkUp app running to receive notifications from your connections. You can connect with up to 20 FreeStyle LibreLink or FreeStyle Libre 3 app users to see their glucose readings.

Having Trouble?
If you successfully installed LibreLinkUp and set up your account, but do not see a notification from the FreeStyle LibreLink or FreeStyle Libre 3 app user, make sure that your phone has an active Internet connection (Wi-Fi or mobile) and your phone settings allow you to receive notifications.

If you still do not see an invitation and you know that the invitation was sent, ask the FreeStyle LibreLink or FreeStyle Libre 3 app user who invited you to send a new invitation to the email adress that you used when installed LibreLinkUp.

Find out more about LibreLinkUp

Find out more about connecting our Digital Health Technologies

References & Disclaimers

Images are for illustrative purposes only. Not real patient, Healthcare Professional or data.

₼ The LibreView website is only compatible with certain operating systems and browsers. Please check www.LibreView.com for additional information.

§ The LibreLinkUp app is only compatible with certain mobile device and operating systems. Please check www.LibreLinkUp.com for more information about device compatibility before using the app. Use of LibreLinkUp and FreeStyle LibreLink requires registration with LibreView. The LibreLinkUp mobile app is not intended to be a primary glucose monitor: home users must consult their primary device(s) and consult a healthcare professional before making any medical interpretation and therapy adjustments from the information provided by the app.

◊ The FreeStyle LibreLink app is only compatible with certain mobile devices and operating systems. Please check the website for more information about device compatibility before using the app. Use of FreeStyle LibreLink requires registration with LibreView.
 
◊◊ The FreeStyle Libre 3 app is only compatible with certain mobile devices and operating systems. Please check our website for more information about device compatibility before using the app. Sharing of glucose data requires registration with LibreView.
 
‡ 60-minute warm-up required when applying the sensor.
 
₸ Sensor is water resistant in up to 1 metre (3 feet) of water for a maximum of 30 minutes. Do not immerse longer than 30 minutes. Not to be used above 10,000 feet.
 
Δ The user’s device must have internet connectivity for glucose data to automatically upload to LibreView.
 
Ѱ For children aged 4-12, a caregiver at least 18 years old is responsible for supervising, managing, and assisting them in using the FreeStyle Libre system and interpreting its readings.

ǁ Transfer of glucose data between applications depends on internet connectivity.

Loading...