
The
FreeStyle LibreLink App
Set up your FreeStyle LibreLink app1 today

Set up the FreeStyle LibreLink app

STEP 1
Check your smartphone is connected to a WiFi or cellular network. Tap SIGN IN or GET STARTED NOW.
Review the legal information and follow instructions to set up a LibreView account or log in to your existing account.

STEP 2
Enter your personal settings.
Tap NEXT after each screen.

STEP 3
Review important information about glucose readings, when to do a blood glucose test, and where to apply a sensor. Tap NEXT to proceed til you see the SCAN NEW SENSOR screen.
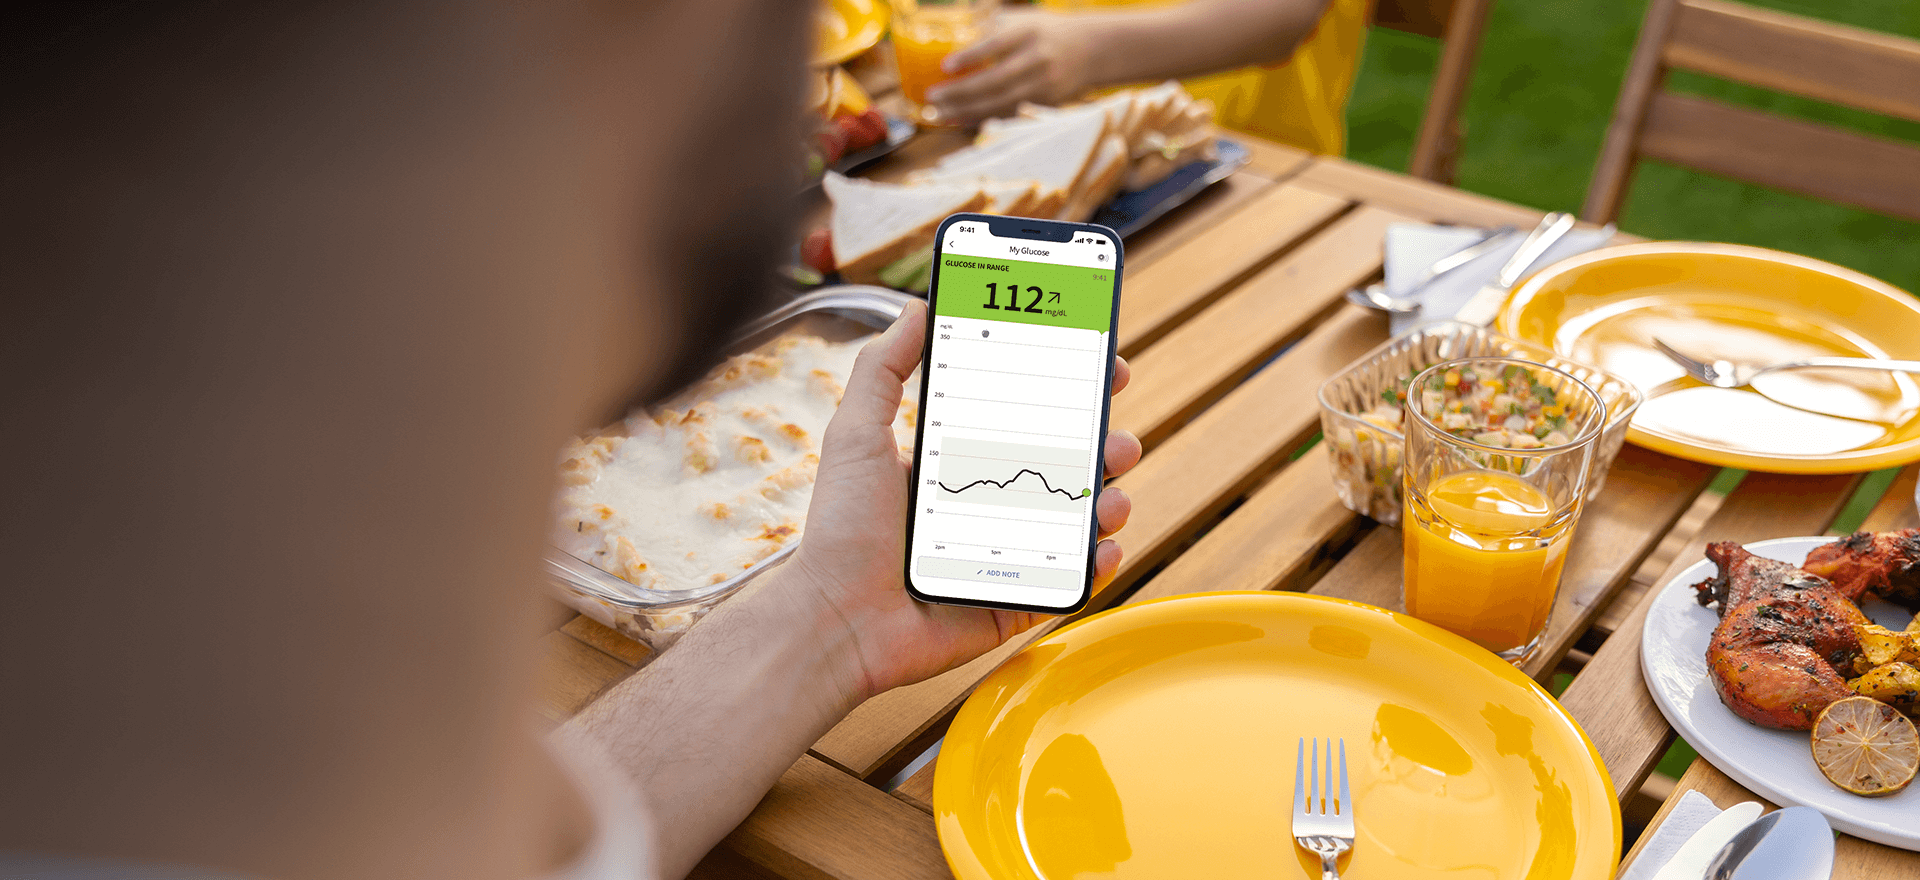
Use the app to scan your Sensor
How to scan.
Tap scan button. You can either tap the box on the Home Screen or at the top right.
Hold top of phone near sensor until you get a tone and/or vibration.

STEP 1
Scan your sensor to start it.
Note: If you want to use both the reader and the app to check your glucose, you must start the sensor with the reader first.

STEP 2
The sensor can be used to check your glucose after the warm-up period. While the sensor is warming up, you can navigate away from the app.

STEP 3
After the warm-up period, scan your sensor to get your glucose reading.
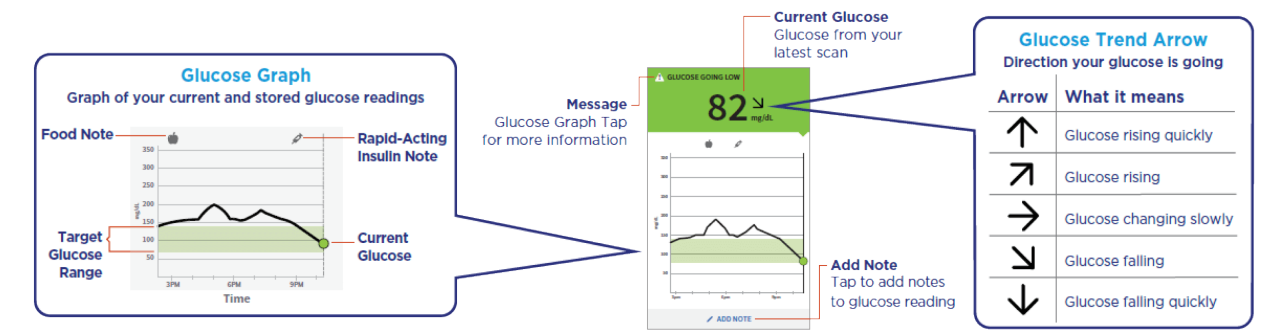
REPORTS OF YOUR GLUCOSE HISTORY
Tap at the top left of the screen to access your reports.

Daily Patterns

Time In Target

Low Glucose Events

Average Glucose

Daily Graph

Estimated A1c
Refer to your User’s Manual for full system instructions and information.
Getting Started with FreeStyle Libre 2


LEARN MORE ABOUT THE FREESTYLE LIBRE 2 SYSTEM
WE’VE GOT TIPS AND TUTORIALS TO HELP YOU MONITOR YOUR GLUCOSE
LEVELS WITHOUT FINGER PRICKING2.
LEVELS WITHOUT FINGER PRICKING2.
WHY
FREESTYLE LIBRE 2?
GETTING STARTED WITH FREESTYLE LIBRE 2
UNDERSTANDING REPORTS AND DATA
REAL-TIME GLUCOSE ALARMS
Images are for illustrative purposes only. Not real patient or Health Care Professional.
Simulated data for illustrative purposes only. Not real patient or data.
1. The FreeStyle LibreLink app is only compatible with certain mobile devices and operating systems. Please check the website for more information about device compatibility before using the app. Use of FreeStyle LibreLink requires registration with LibreView.
2. Finger pricks are required if glucose readings do not match symptoms or expectations.